
What if you could pick up an old-school telephone in your house, call a friend’s house across town, the country or world, and have that call travel over your existing internet connection, fully encrypted, with no monthly bill from a phone company? That’s the basic idea behind this project. Phreephoneing is a free, private phone system built from a Raspberry Pis, Analog Telephone Adapters (ATAs), subnet routers, and a main router that creates an encrypted mesh between locations.
WRT Powered Subnet Router / Tailscale Setup Guide for VoIP ATAs
This guide covers setting up a GL.iNet Brume 2/Beryl AX router with Tailscale to connect remote ATAs to a central PBX for a free, private and encrypted phone system. It is not connected to the larger phone system. You can only call the users you set up with the system. You don’t have to pay a phone company monthly, just your ISP. Wireguard encrypts the traffic between subnet routers, just like the major data centers do.
Overview

Prerequisites
- A broadband internet connection at the main site and each remote site (no telephone line needed—this system is completely independent from the telecom network)
- An existing wireless router with internet access at the main site and at each remote site (the Brume 2/Beryl AX connects to these routers)
- GL.iNet Brume 2 (GL-MT2500) router, one for each remote line and one for the main site that will be on the same local network as the PBX, or GL.iNet Beryl AX (GL-MT3000) which is the wireless version, great to use when one of your remote line users does not want to place the phone next to the router, but to another location without having to run ethernet cables. When we mention the remote Brume 2 and Tailscale, the Beryl AX can be substituted here, but we’ll go into the wireless details in a separate section near the end.
- Tailscale account (free tier is adequate)
- Tailscale client installed on your admin computer – download from https://tailscale.com/download and sign in with the same Tailscale account. This allows you to SSH into any Brume via its Tailscale IP and also into each ATA admin. You will be on the same Tailnet.
- A Raspberry Pi 3, 4, or 5 (not Zero) with RasPBX image written to the microSD card. RasPBX is just Asterisk 16.13.0 & FreePBX 15.0.16.75, Raspbian Buster Lite, Apache, PHP and MySQL all pre-installed on a bootable image.
- An ATA device for each line (Cisco SPA, Linksys PAP2T, Grandstream HT802, etc.)
- An old touch tone analog telephone at each location you want to call or you want to call you.
Steps
Main Site Setup (do these first):
- Step 1: Main Site Brume 2 Setup
- Step 2: Main Site Firewall Configuration
- Step 3: Reserve PBX IP Address
- Step 4: Create Extensions in FreePBX
- Step 5: Configure Main Site ATA
- Step 6: Verify Main Site SIP Registration
- Step 7: Configure and Test Remote ATA Locally
Remote Site Setup (repeat for each remote location):
- Step 8: Remote Site Brume 2 Setup
- Step 9: Remote Site Firewall Configuration
- Step 10: Verify Tailscale Routing
- Step 11: Reconfigure Remote ATA for Deployment
- Step 12: Verify Remote SIP Registration
- Step 13: Deploy to Remote Site
Final Steps:
- Step 14: Reboot Test
- Step 15: Make a Test Call
- Step 16: Export Backups
- Optional: Wireless Setup with Beryl AX (Remote Sites)
Main Site Setup
Complete all main site steps before setting up any remote sites.
Step 1: Main Site Brume 2 Setup
The main site Brume 2 sits on the same local network as the PBX and acts as the Tailscale gateway for remote sites. It stays in Router mode (the default) but connects differently than remote Brumes.
Initial Setup
- At your local site where the PBX will live, connect Brume 2 WAN port to your router (gets internet and local network via DHCP)
- The PBX and local ATA connect to the same network as the Brume’s WAN (not the LAN port), so just connect them to your router
- Access Brume web UI (default: http://192.168.8.1)
- Set admin password
- Leave Network Mode as Router (the default)
- Note the Brume’s WAN IP (check your router’s DHCP client list)
Enable Tailscale and Join Tailnet
- In Brume web UI: Applications → Tailscale
- Click Enable Tailscale
- Click the authentication link and log into your Tailscale account
- Enable “Allow Remote Access LAN”
- Enable “Allow Remote Access WAN”
- Note the Tailscale IP assigned (100.x.x.x) – visible in Tailscale admin console
Approve Route and Name Device
- Go to https://login.tailscale.com/admin/machines
- Find the main Brume and approve the subnet route (192.168.1.0/24)
- Rename the device – click the three-dot menu → “Edit machine name” → name it something like “gl-mt2500-main” or “gl-mt2500-pbx-site” to identify it easily
eth0 instead of br-lan.Step 2: Main Site Firewall Configuration
SSH to the main Brume to configure the firewall rules. These are specific to the main site because the PBX is on the WAN side.
ssh root@192.168.8.1(Password is the same as the web UI admin password you created)
Make Filesystem Writable
GL.iNet routers use a read-only overlay filesystem by default. Run this command first to ensure your changes persist across reboots:
. /lib/functions/gl_util.sh && remount_ubifs2a. Create UCI Firewall Zone
Run these commands to create a Tailscale firewall zone:
# Create Tailscale zone
uci add firewall zone
uci set firewall.@zone[-1].name='ts'
uci set firewall.@zone[-1].input='ACCEPT'
uci set firewall.@zone[-1].output='ACCEPT'
uci set firewall.@zone[-1].forward='ACCEPT'
uci set firewall.@zone[-1].device='tailscale0'

# Add forwarding ts -> lan
uci add firewall forwarding
uci set firewall.@forwarding[-1].src='ts'
uci set firewall.@forwarding[-1].dest='lan'

# Add forwarding lan -> ts
uci add firewall forwarding
uci set firewall.@forwarding[-1].src='lan'
uci set firewall.@forwarding[-1].dest='ts'

# Save changes
uci commit firewall
Verify:
uci show firewall | grep -E "zone.*ts|forwarding"The output should match the content you entered above.
2b. Configure /etc/rc.local (Main Site)
This ensures Tailscale settings persist after reboot.
ENDFILE must have no spaces before it. If your terminal adds leading spaces when you paste, use the arrow keys and backspace to remove them before pressing Enter.cat > /etc/rc.local << 'ENDFILE'
# Put your custom commands here that should be executed once
# the system init finished. By default this file does nothing.
. /lib/functions/gl_util.sh
remount_ubifs
# Wait for Tailscale to be ready
sleep 10
# Apply Tailscale settings - advertise the PBX subnet
tailscale up --advertise-routes=192.168.1.0/24 --accept-routes --reset
exit 0
ENDFILEVerify:
cat /etc/rc.localThe output should match the content you entered above.
2c. Configure /etc/firewall.user (Main Site)
The main site uses eth0 (WAN interface) because the PBX is on the WAN side.
ENDFILE must have no leading spaces.cat >> /etc/firewall.user << 'ENDFILE'
# MASQUERADE traffic from WAN subnet to Tailscale
iptables -t nat -I POSTROUTING -o tailscale0 -s 192.168.1.0/24 -j MASQUERADE
# FORWARD rules for eth0 <-> tailscale0 (WAN to Tailscale)
iptables -I FORWARD -i tailscale0 -o eth0 -j ACCEPT
iptables -I FORWARD -i eth0 -o tailscale0 -j ACCEPT
# Restart Tailscale to restore its rules
/etc/init.d/tailscale restart
ENDFILEVerify:
cat /etc/firewall.userThe output should match the content you entered above.
2d. Apply Settings
tailscale up --advertise-routes=192.168.1.0/24 --accept-routes --reset
/etc/init.d/firewall restart
Step 3: Reserve PBX IP Address
Log into your main site router and create a DHCP reservation for the PBX (Raspberry Pi). This prevents the router from assigning a different IP address to the PBX after a power outage or reboot, which would require updating all ATA configurations.
Look for DHCP reservation, static lease, or address reservation in your router’s settings. You’ll need the PBX’s MAC address and its current IP (192.168.1.100 or whatever you’ve been using).
Step 4: Create Extensions in FreePBX
Create SIP extensions for all phones in your system – both the main site ATA and all remote ATAs. Do this now while you’re at the main site.
- Log into FreePBX web interface on your local network (check your router for the PBX IP). The default username is admin, password is admin.
- Go to Applications → Extensions
- Click Add Extension → Add New PJSIP Extension (or SIP if using chan_sip)
- Enter:
- User Extension: Extension number (e.g., 100 for main site, 101-109 for remote sites)
- Display Name: Description (e.g., “Main House”, “Mom and Dad”, “Uncle Bob”)
- Secret: Copy the auto-generated password or set your own
- Click Submit
- Click the red “Apply Config” button at the top
- Copy the Secret (password) – you’ll need it for the ATA
- Repeat steps 2 through 7 for each phone in your system (main site + all remote sites)
Step 5: Configure Main Site ATA
The main site ATA connects directly to your router (same network as the PBX), so configuration is simpler than remote ATAs.
Access the ATA’s web interface and configure:
Network Settings
| Setting | Value |
|---|---|
| Connection Type | DHCP or Static IP |
| IP Address | (If static: 192.168.1.101 or similar) |
| Subnet Mask | 255.255.255.0 |
| Default Gateway | Your router’s IP (e.g., 192.168.1.1) |
| Primary DNS | 8.8.8.8 or your router’s IP |
SIP/Line Settings
| Setting | Value |
|---|---|
| SIP Proxy | 192.168.1.100 (PBX IP) |
| SIP Port | 5060 |
| Register | Yes |
| User ID | Extension number (e.g., 100) |
| Auth ID | Same as User ID |
| Password | SIP secret from FreePBX |
If you will use both lines on a 2 line ATA the 2nd line should use SIP port 5061, and it might set this automatically, but verify it.
Click “Submit All Changes” to save and trigger registration.
Step 6: Verify Main Site SIP Registration
Check the ATA
- Access the ATA’s web admin (e.g., http://192.168.1.101)
- Look for registration status – usually on the main status page or under Line/SIP settings
- Should show “Registered” or “Online”
Verify on the PBX
SSH into the PBX (Raspberry Pi). The username: root, password: raspberry.
ssh root@192.168.1.100Check registration:
asterisk -rx "pjsip show endpoints" | grep 100
# or for chan_sip:
asterisk -rx "sip show peers" | grep 100
Should show the extension with status “OK” or “Avail”.
Test Dial Tone
Pick up the phone connected to the main site ATA. You should hear a dial tone, confirming the ATA is registered with the PBX.
Step 7: Configure and Test Remote ATA Locally
Before setting up the remote Brume 2, test the remote ATA locally on your main network. This confirms the extension works before adding the complexity of the Tailscale tunnel.
Temporary Local Setup
Connect the remote ATA directly to your main router (the same network as the PBX), not to the Brume 2 yet. Leave the ATA’s network settings on DHCP/Dynamic – no network configuration is needed for this test.
SIP/Line Settings
| Setting | Value |
|---|---|
| SIP Proxy | 192.168.1.100 (PBX IP) |
| SIP Port | 5060 |
| Register | Yes |
| User ID | Extension number (e.g., 101) |
| Auth ID | Same as User ID |
| Password | SIP secret from FreePBX (created in Step 4) |
Click “Submit All Changes” to save and trigger registration.
Test Local Call
- Verify the ATA shows “Registered” in its web interface
- Pick up the phone connected to this ATA – you should hear dial tone
- Dial the main site extension (e.g., 100)
- The main site phone should ring – answer and verify two-way audio works
- Hang up, then test the other direction: pick up the main site phone and dial this extension (e.g., 101)
- Answer and verify two-way audio works in both directions
Once calls succeed in both directions, you’ve confirmed the extension is configured correctly. You’ll reconfigure this ATA for the remote subnet after setting up the remote Brume 2.
Remote Site Setup
Repeat these steps for each remote location. Complete the main site setup first!
Step 8: Remote Site Brume 2 Setup
Each remote site needs its own Brume 2 in router mode (the default) with a unique subnet.
Pre-deployment Setup (do this at your location)
To avoid IP conflicts, configure each remote Brume while:
- The main Brume is powered off, OR
- On a different network from the main Brume (since both default to 192.168.8.1)
- Connect Brume 2 WAN port to your router (needs internet for Tailscale auth)
- Access Brume web UI (default: http://192.168.8.1)
- Set admin password
- Go to Network → LAN
- Change the LAN IP to use a unique subnet:
- Change the third octet (the “8” in 192.168.8.1) to a unique number
- Example: change
192.168.8.1to192.168.10.1for the first remote site - Use sequential numbers: 192.168.9.1, 192.168.10.1, 192.168.11.1, etc.
- The subnet mask stays
255.255.255.0 - Click Apply – you’ll be disconnected briefly as the IP changes
- Reconnect to the Brume at its new IP (e.g., http://192.168.10.1)
- Note this new LAN IP – it becomes the ATA’s gateway
Enable Tailscale
- In Brume web UI: Applications → Tailscale
- Click Enable Tailscale
- Click the authentication link and log into your Tailscale account
- Enable “Allow Remote Access LAN”
- Enable “Allow Remote Access WAN”
- Note the Tailscale IP assigned (100.x.x.x) – visible in Tailscale admin console
Approve Route and Name Device
- Go to https://login.tailscale.com/admin/machines
- Find the new Brume and approve the subnet route
- Rename the device – use the name or initials of the friend/family member where it will be deployed (e.g., “gl-mt2500-uncle-bob”, “gl-mt2500-mom-dad”). This is done by clicking the 3 dost on the right and selecting Edit Rout Settings. Then you will see the route or routes to approve.
Choosing a Subnet
Use a unique /24 subnet for each site:
| Site | Subnet | Brume LAN IP |
|---|---|---|
| Main (PBX) | 192.168.1.0/24 | (WAN side, no change needed) |
| Remote Site 1 | 192.168.9.0/24 | 192.168.9.1 |
| Remote Site 2 | 192.168.10.0/24 | 192.168.10.1 |
| Remote Site 3 | 192.168.11.0/24 | 192.168.11.1 |
| Remote Site 4 | 192.168.12.0/24 | 192.168.12.1 |
Step 9: Remote Site Firewall Configuration
SSH to the remote Brume to configure the firewall rules. These are specific to remote sites because the ATA is on the LAN side.
ssh root@192.168.X.1(Replace X with your subnet number, e.g., 192.168.10.1. Password is the same as the web UI admin password you created)
Make Filesystem Writable
GL.iNet routers use a read-only overlay filesystem by default. Run this command first to ensure your changes persist across reboots:
. /lib/functions/gl_util.sh && remount_ubifs9a. Create UCI Firewall Zone
Run these commands to create a Tailscale firewall zone (same as main site):
# Create Tailscale zone
uci add firewall zone
uci set firewall.@zone[-1].name='ts'
uci set firewall.@zone[-1].input='ACCEPT'
uci set firewall.@zone[-1].output='ACCEPT'
uci set firewall.@zone[-1].forward='ACCEPT'
uci set firewall.@zone[-1].device='tailscale0'

# Add forwarding ts -> lan
uci add firewall forwarding
uci set firewall.@forwarding[-1].src='ts'
uci set firewall.@forwarding[-1].dest='lan'

# Add forwarding lan -> ts
uci add firewall forwarding
uci set firewall.@forwarding[-1].src='lan'
uci set firewall.@forwarding[-1].dest='ts'

# Save changes
uci commit firewall
Verify:
uci show firewall | grep -E "zone.*ts|forwarding"The output should match the content you entered above.
9b. Configure /etc/rc.local (Remote Site)
Copy the code below to a text editor, replace 192.168.X.0/24 with your actual subnet (e.g., 192.168.10.0/24), then paste into the terminal:
ENDFILE must have no spaces before it.cat > /etc/rc.local << 'ENDFILE'
# Put your custom commands here that should be executed once
# the system init finished. By default this file does nothing.
. /lib/functions/gl_util.sh
remount_ubifs
# Wait for Tailscale to be ready
sleep 10
# Apply Tailscale settings - CHANGE SUBNET BELOW
tailscale up --advertise-routes=192.168.X.0/24 --accept-routes --reset
# Add explicit route to PBX - CHANGE IP BELOW IF DIFFERENT
ip route add 192.168.1.100/32 dev tailscale0 2>/dev/null || true
exit 0
ENDFILEVerify:
cat /etc/rc.localThe output should match the content you entered above.
9c. Configure /etc/firewall.user (Remote Site)
Remote sites use br-lan (LAN interface) because the ATA is on the LAN side.
Copy the code below to a text editor, replace 192.168.X.0/24 with your actual subnet, then paste into the terminal:
ENDFILE must have no leading spaces.cat >> /etc/firewall.user << 'ENDFILE'
# allow LAN <-> Tailscale
iptables -I FORWARD -i tailscale0 -o br-lan -j ACCEPT
iptables -I FORWARD -i br-lan -o tailscale0 -j ACCEPT
# MASQUERADE traffic from LAN to Tailscale - CHANGE SUBNET BELOW
iptables -t nat -I POSTROUTING -o tailscale0 -s 192.168.X.0/24 -j MASQUERADE
# Restart Tailscale to restore its rules
/etc/init.d/tailscale restart
ENDFILEVerify:
cat /etc/firewall.userThe output should match the content you entered above.
9d. Apply Settings
tailscale up --advertise-routes=192.168.X.0/24 --accept-routes --reset
/etc/init.d/firewall restart
Step 10: Verify Tailscale Routing
On the remote Brume, test connectivity to the PBX:
# Should show route is advertised
tailscale debug prefs | grep -A3 AdvertiseRoutes

# Should return "pong from <main-brume-name>"
tailscale ping 192.168.1.100

# Should succeed with ~20-50ms latency
ping -c 3 192.168.1.100
If tailscale ping says “no matching peer”:
- Check that the main site subnet (e.g., 192.168.1.0/24) route is approved for the main Brume in Tailscale admin
- Run
tailscale up --accept-routes --resetagain on the remote Brume - Wait 30 seconds and retry
Step 11: Reconfigure Remote ATA for Deployment
Connect the ATA you tested in Step 7 to the remote Brume’s LAN port.
Network Settings
No changes needed – leave the ATA on DHCP. The Brume will assign it an IP address in the correct subnet automatically.
To find the ATA’s IP address, log into the Brume 2 web admin and check the Clients list.
SIP/Line Settings
No changes needed – the SIP settings from Step 7 remain the same. The ATA will reach the PBX at 192.168.1.100 through the Tailscale tunnel.
Step 12: Verify Remote SIP Registration
Check the ATA
- Access the ATA’s web admin (e.g., http://192.168.10.100). If you are unsure of the ATA’s IP you can see it under Clients in the Brume 2/Beryl AX web admin.
- Look for registration status – usually on the main status page or under Line/SIP settings
- Should show “Registered” or “Online”
- If it shows “Registering…”, “Failed”, or “Offline”, there’s a connectivity issue – check the Brume’s Tailscale connection first (Step 10)
Verify on the PBX
SSH into the PBX and check registration:
asterisk -rx "pjsip show endpoints" | grep 101
# or for chan_sip:
asterisk -rx "sip show peers" | grep 101
Replace 101 with your extension number. Should show status “OK” or “Avail”.
If not registered, wait 1-2 minutes or reboot the ATA.
Step 13: Deploy to Remote Site
Once pre-configured and tested locally, deployment is simple:
- Ship or carry the Brume 2, ATA, phone, and all the cables to the remote location
- Connect Brume WAN port to the remote site’s router (gets internet via DHCP)
- Connect Brume LAN port to ATA (or a switch with ATA connected)
- Connect an analog phone to the ATA
- Power on – the Brume will automatically connect to Tailscale
- Test by calling between the remote phone and main site phone
Remote Administration
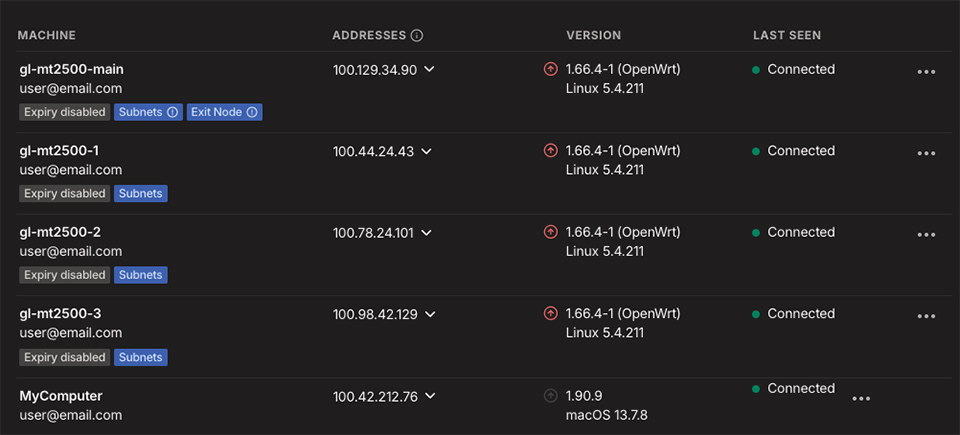
If anything goes wrong, you can access the Brume remotely via its Tailscale IP:
- Visit the Tailscale admin console
- Find the Brume 2 you need to access
- Click the dropdown arrow next to the Tailscale IP address and click the copy icon
- Make sure the Tailscale client app is running and logged in on your computer
- Paste that IP address into a new browser tab – you’re now logged into the Brume 2 web admin remotely
- To access the ATA, go to the Clients tab in the Brume 2 admin to find the ATA’s IP address
- Copy that IP and paste it into a new browser tab to access the ATA’s web admin
Final Steps
Step 14: Reboot Test
Verify everything survives a power cycle:
- Power off the Brume (unplug power)
- Wait 30 seconds
- Power on
- Wait 3-5 minutes for full boot and Tailscale connection
- Check ATA registration on PBX:
asterisk -rx "pjsip show endpoints" | grep <extension>
If registration fails after reboot, check:
/etc/rc.localhas the tailscale up command/etc/firewall.userhas the MASQUERADE rule- Subnet route is still approved in Tailscale admin
Step 15: Make a Test Call
The ultimate test – pick up the phone and make a call!
- Pick up the analog phone connected to the ATA
- Listen for dial tone (confirms ATA is working and registered. If there is no dialtone it is not registered with the PBX, needs more route troubleshooting)
- Dial another extension on the system
- Verify two-way audio works (you can hear them, they can hear you)
If you don’t hear dial tone:
- Check ATA registration (Step 6 for main site, Step 12 for remote)
- Verify the phone is plugged into the correct ATA port (usually “Phone 1”)
- Check the ATA’s line settings match the FreePBX extension
If you hear dial tone but get a fast busy signal when calling the remote extension:
- The remote extension is likely not registered with the PBX
- Check the remote ATA’s registration status in its web admin
- Verify Tailscale routing (Step 10) and firewall configuration (Step 9)
If you hear dial tone but calls don’t connect:
- Verify the dial plan on the ATA allows the numbers you’re dialing
Step 16: Export Backups
Save a backup of each Brume configuration:
- Access Advanced Settings by logging in to the Brume 2’s administration panel through your browser (use the Tailscale IP address for that location) and navigate to More Settings -> Advanced.
- Click log into LuCi. You will be prompted to log in to the LuCi interface using your root username and password.
- Hover over the System menu at the top nav In the LuCi interface anc click Backup/Flash Firmware.
- Click Generate archive. This will download a .tar.gz file. This is a snapshot for all settings in the this Brume 2. Make sure to prepend the file name with the name of the location or friend/family member that this Brume 2 lives at, Example: `main-backup-GL-MT2500-2025-12-15.tar.gz`, `uncle-bob-backup-GL-MT2500-2025-12-15.tar.gz`
- Restore Settings (if and when needed) on the same page in LuCi you can click Upload archive under the restore settings if you had to reset the Brume 2 for some reason or misconfigured it in some way.
Optional: Wireless Setup with Beryl AX (Remote Sites)
For remote sites where you don’t want to place the phone right next to the router or need to avoid running cables, you can use a wireless subnet router instead: the GL.iNet Beryl AX (GL-MT3000).
The Beryl AX connects wirelessly to the remote site’s existing WiFi router, then provides a wired ethernet port for the ATA. This lets you place the phone anywhere with a power outlet and WiFi coverage.
Setting Up Beryl AX in Repeater Mode
- Power on the Beryl AX and connect your computer to it via ethernet or its default WiFi network (check the label on the device for the default SSID and password)
- Access the web UI at http://192.168.8.1
- Complete initial setup (set admin password, timezone, etc.)
- Go to Network → LAN and change the LAN IP to a unique subnet (e.g., 192.168.10.1) just like with the Brume 2 – this avoids conflicts
- Click Apply and reconnect to the new IP (e.g., http://192.168.10.1)
- Go to Internet → Repeater
- If you have a spare router give that router the same name and password as the one it will be connected to at your friend’s or family member’s home and then set up the Beryl AX to log into it, so once it is on site, it will connect directly. Confirm, if you can, if your friend or family member’s existing router is 5gHz or 2.5gHz.
- Click Scan to find available WiFi networks
- Select the remote site’s WiFi network and enter the password
- Click Join – the Beryl will connect wirelessly to the wireless network once it is on site. For setup, just use Ethernet.
- Reconnect and verify the connection shows as active in the Repeater section
Configure Tailscale and Firewall
Once connected to WiFi or Ethernet, configure Tailscale on the Beryl AX the same way as the Brume 2 in Step 8, then configure the firewall as in Step 9 (Remote Site version):
- Go to Applications → Tailscale and enable it
- Authenticate with your Tailscale account
- Enable “Allow Remote Access LAN” and “Allow Remote Access WAN”
- SSH to the Beryl:
ssh root@192.168.X.1 - Configure the UCI firewall zone (Step 8a)
- Configure
/etc/rc.local(Step 8b – Remote Site version) - Configure
/etc/firewall.user(Step 8c – Remote Site version) - Run:
tailscale up --advertise-routes=192.168.X.0/24 --accept-routes --reset - Restart firewall:
/etc/init.d/firewall restart - Approve the subnet route in Tailscale admin and rename the device
- Export a backup
Deployment
- Ship or bring the pre-configured Beryl AX, ATA and phone to the remote location
- Power it on anywhere with WiFi coverage – it will automatically connect to the WiFi network you configured
- Connect the ATA to the Beryl’s LAN port via ethernet
- Connect an analog phone to the ATA
- The Beryl connects to WiFi → Tailscale → PBX automatically
Quick Reference
Key Files on Brume
| File | Purpose |
|---|---|
/etc/rc.local |
Tailscale up command at boot |
/etc/firewall.user |
MASQUERADE and FORWARD rules |
/etc/config/firewall |
UCI firewall zones (persistent) |
/etc/config/tailscale |
GL.iNet Tailscale settings |
/etc/tailscale/tailscaled.state |
Tailscale auth state |
Essential Commands (Brume 2/Beryl AX)
Check Tailscale status:
tailscale statusCheck advertised routes:
tailscale debug prefs | grep -A3 AdvertiseRoutesTest Tailscale routing to an IP:
tailscale ping <ip-address>Check firewall rules:
iptables -L FORWARD -n -v | head -10
iptables -t nat -L POSTROUTING -n -v | grep MASQ
Restart Tailscale:
/etc/init.d/tailscale restartRestart firewall (also runs firewall.user):
/etc/init.d/firewall restartEssential Commands (RasPBX)
Check registered extensions:
asterisk -rx "pjsip show endpoints"Or for chan_sip:
asterisk -rx "sip show peers"Monitor SIP activity in real-time (Control+C to exit):
asterisk -rx "pjsip set logger on"Live console with verbosity – more v’s = more detail (type “quit” to exit):
asterisk -rvvvvCheck active calls:
asterisk -rx "core show calls"View recent call history:
asterisk -rx "core show channels verbose"Restart Asterisk (if needed):
systemctl restart asteriskFirewall Configuration Differences
| Setting | Main Site | Remote Site |
|---|---|---|
| Interface | eth0 (WAN) |
br-lan (LAN) |
| Reason | PBX is on WAN side | ATA is on LAN side |
| rc.local route | Not needed | Adds route to PBX |
Example Network Layout
| Device | Tailscale IP | LAN Subnet | Purpose |
|---|---|---|---|
| Main Brume | 100.x.x.1 | 192.168.1.0/24 | PBX site gateway |
| Remote Brume 1 | 100.x.x.2 | 192.168.10.0/24 | Remote house 1 |
| Remote Brume 2 | 100.x.x.3 | 192.168.11.0/24 | Remote house 2 |
| Remote Brume 3 | 100.x.x.4 | 192.168.12.0/24 | Remote house 3 |